Alight Motion for Beginners: Complete Step-by-Step Guide (2026)
Updated October 2026 · Written by M Mohsin
If you’ve never edited a video before, Alight Motion can look intimidating. There are layers, keyframes, effects and a timeline full of buttons. The good news is that you only need a handful of basics to make clean, eye-catching videos. This guide walks you through them in the order you’ll actually use them.
Is Alight Motion Good for Beginners?
Yes, as long as you learn it step by step. Alight Motion is a layer-based editor. Every clip, image, text and sound sits on its own layer, which gives you far more control than template apps. The learning curve is a little steeper than CapCut, but you’ll be able to make edits that template apps simply can’t.
Who it’s best for: TikTok and Reels creators, gamers making montages, anyone making intros, lyric videos or motion graphics.
Step 1: Install the Official App
Download Alight Motion from the Google Play Store (Android) or the App Store (iPhone and iPad). Always use the official version. It’s free to install, gets regular updates, and keeps your projects and account safe.
Step 2: Understand the Main Screen
- Project list: all your saved projects.
- + button: start a new project.
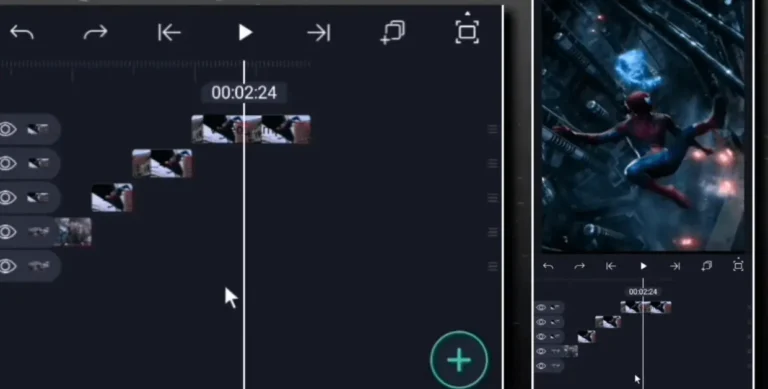
- Inside a project: the preview at the top, the timeline at the bottom, and the + button to add layers.
- Layer settings: tap any layer to open its options (move, effects, color, opacity and more).
Step 3: Create Your First Project
- Tap + and choose an aspect ratio: 9:16 for TikTok/Reels/Shorts, 16:9 for YouTube, 1:1 for square posts.
- Choose 30 fps for most videos, or 60 fps for smooth gaming or sports edits.
- Tap Create Project.
Step 4: Add and Trim Clips
- Tap + → Media and pick your video or photo.
- Drag the edges of the layer on the timeline to trim it.
- To cut a clip in two, move the playhead and use the split option.
- Long-press and drag layers to change their order.
Learn more in our full guide to moving layers.
Step 5: Learn Keyframes (the Most Important Skill)
A keyframe saves a value at a point in time. Add two keyframes with different values and Alight Motion animates between them.
- Select a layer and go to its first frame.
- Tap the keyframe (diamond) icon to set a starting point.
- Move the playhead forward and change the position, size or rotation. A second keyframe is added.
- Play it back. Your layer now moves.
Make it smooth: tap a keyframe and choose an easing curve. Ease-in/ease-out makes motion feel natural.
Step 6: Add Text
Tap + → Text, type your words, then pick a font, color and size. Add a shadow or outline so it stays readable on any background. Animate it with keyframes from Step 5.
Step 7: Add Effects and Transitions
Select a layer, open Effects and tap + to browse. Good starter effects:
- Blur: soft backgrounds and smooth transitions
- Glow: for text and highlights
- Shake: for beat drops (see our shake effect presets)
- Color correction: fix brightness, contrast and saturation
Start with one or two effects. Too many at once makes videos look busy.
Step 8: Add Music and Sync to the Beat
Tap + → Audio and import a song. Play it back and note where the beats land, then line up your cuts and keyframes with them. Beat-synced edits feel much more professional.
Step 9: Export Your Video
- Tap the export icon and choose Video.
- Select 1080p and match the frame rate to your project.
- Wait for the export, then watch it once before posting.
The free version adds a small watermark. Alight Motion Pro, the official paid membership, removes the watermark and ads and unlocks extra effects.
Beginner Tips That Save Time
- Save presets: if you build an effect you like, save it and reuse it.
- Copy keyframes: copy and paste animation between layers instead of redoing it.
- Lower preview quality if the app lags. Your export quality stays the same.
- Name your layers so big projects stay organized.
- Practice small: recreate a 10-second edit you like before trying full videos.
Free vs Pro: What Beginners Need to Know
Everything in this guide works in the free version. Pro is worth it later if you post often and want watermark-free exports, no ads and the full effects library.
Frequently Asked Questions
Is Alight Motion free?
Yes, it’s free to download and use. Exports include a watermark unless you have Pro.
Is Alight Motion harder than CapCut?
A little. CapCut is quicker for simple cuts and templates. Alight Motion takes longer to learn but gives you much more creative control.
Can I use Alight Motion on PC?
There’s no official Windows app. It’s designed for Android, iPhone, iPad and Chromebook.
How long does it take to learn?
Most people get comfortable with the basics in a weekend of practice. Keyframes are the main thing to master.
Conclusion
Alight Motion is a great first editor if you want more than templates. Learn the timeline, master keyframes, add effects carefully, and export in 1080p. Practice with short edits, and within a few days you’ll be making videos you’re proud of.